Exploring Blender Techniques: Pulse, Chop, Puree, and More
Blenders are well-known for their remarkable versatility in the kitchen, which makes them an essential tool for the preparation of a wide variety of dishes. Blenders are an indispensable tool for creating a wide variety of modern culinary creations, from soups and smoothies to sauces and even desserts. Because of their ability to blend and process ingredients seamlessly, they have become a standard appliance in both domestic and commercial kitchens.
Blenders stand out as multitasking workhorses in the world of technological advancements in the culinary arts. Their expertise goes beyond the typical process of making smoothies and includes operations such as chopping, pureeing, and emulsifying the ingredients. Because of their versatility, blenders are an indispensable tool for anyone who wants to improve their skills in the kitchen and the bakery.
Learning how to use a blender in all of its many different configurations is essential to realizing the full potential of these kinds of kitchen appliances. Cooks who can achieve the desired textures and consistencies in their recipes are those who have a solid understanding of how to manipulate blending speed, duration, and styles. Mastering the use of a blender allows for greater precision and control in the preparation of food, regardless of whether one is going for a velvety soup or a chunky salsa.
This article delves into the nuances of using a blender, with a particular emphasis on the essential functions of pulsing, chopping, and pureeing. Each section delves into a specific application of these strategies, shedding light on when and how to make use of them most effectively. By the time they conclude, readers will have acquired a thorough comprehension of how to maximize the potential of their blenders for a wide variety of culinary creations.
Pulse Technique
Definition and Purpose of Pulsing
Pulsing is a method used in the kitchen for preparing food that entails processing ingredients in a food processor or blender in short bursts, also known as pulses. The finished dish should have a certain texture or consistency, which can be accomplished by pulsing the ingredients. Pulsing, as opposed to continuous blending, enables better control over the processing, which eliminates the risk of overmixing or overprocessing the ingredients.
The key objectives of pulsing include:
- Reducing the size of the ingredients so that they are all roughly the same size.
- The process of combining components without reducing them to a single-component mass.
- Depending on the final product you want, achieving a texture that is either coarse or finely chopped is possible.
- Try not to overwork the ingredients, as this can lead to a loss of texture or an excessive blending of the ingredients.
When to Use the Pulse Technique
Pulsing is especially helpful in a variety of cooking and baking situations, including but not limited to the following:
- Chopping Vegetables: If you want to quickly chop vegetables like onions, garlic, or herbs, pulsing is an efficient method that also gives you control over the size of the chopped pieces.
- Making Salsas and Dips: If you want your salsa, guacamole, or any other dip to have a chunky texture, pulsing is an essential step in the preparation process.
- Pie Crusts and Dough: Pulsing helps combine the ingredients in pastry dough or pie crusts without overworking the dough, which results in a flakier texture. This is especially helpful when making pie crusts.
- Pesto and Sauces: It is common practice to use pulsing when preparing pesto, tomato sauces, or curry pastes to preserve a textured consistency in the final product.
- Crushing Ingredients: When you need to crush ingredients like nuts, cookies, or crackers for use in toppings or crusts, pulsing is the best method to use.

Step-by-Step Guide on How to Pulse Effectively
Follow these general steps for effective pulsing:
- Prepare Ingredients: Check to see that all of your ingredients have been cleaned, trimmed, and are prepared to be processed.
- Load the Processor: Put all of the ingredients into the food processor or blender, taking care not to cram them in too tightly.
- Pulse in Short Bursts: Instead of blending everything continuously, you should begin pulsing in short bursts. Because of this, excessive processing is avoided.
- Check Consistency: After each pulse, come to a stop and examine the consistency. To guarantee an even processing, you should, if necessary, scrape down the sides of the container.
- Repeat as Necessary: Continue to pulse the ingredients until you reach the desired consistency. Take care not to over-process the material.
Examples of Recipes Where Pulsing is Essential
- Pico de Gallo (Fresh Salsa): The use of a blender or food processor is necessary to achieve the desired consistency of chunky vegetables in fresh salsa.
- Pesto Sauce: When making a pesto sauce with different textures, such as basil, garlic, nuts, and cheese, pulsing the ingredients together is an essential step.
- Pie Crust: When making a flaky pie crust without overworking the dough, one of the most important steps is to pulse cold butter into the flour.
- Hummus: Creating a smooth yet slightly textured hummus can be accomplished by pulsing chickpeas, tahini, garlic, and lemon juice together.
- Nut Crust for Cheesecake: Combining sugar and nuts in a food processor is an essential step in the process of making a textured crust for cheesecakes.
You can improve the consistency and overall quality of a variety of dishes in your culinary repertoire by becoming proficient in the pulse technique.
Chop Technique
Understanding the Chop Technique and its Applications
The chopping technique is a culinary method that entails chopping up the components of a dish into uniformly sized pieces using a knife or other implements designed for cutting. This method is adaptable and can be utilized in a wide variety of cooking styles. Chopping is not the same as mincing or dicing because it typically results in pieces that are larger and less uniform. This gives food a more home-cooked or textured feel.
Applications of the chopping technique include:
- Enhancing Texture: The act of chopping provides dishes with texture, which in turn creates a pleasing mouthfeel.
- Building Flavor: The ingredients are chopped into different sizes, which contributes to the dish having a more complex flavor profile.
- Quick Preparation: Chopping is a time-saving and productive method that can be applied to the preparation of ingredients for a wide variety of recipes.
Types of Ingredients Suitable for Chopping
The chop technique is suitable for a variety of ingredients, including:
- Vegetables: When making soups, stews, and stir-fries, it is common practice to chop ingredients such as onions, garlic, bell peppers, carrots, and celery.
- Herbs: Chopping fresh herbs like parsley, cilantro, and basil is a common way to add more flavor and freshness to various dishes.
- Nuts: Chopping nuts produces a textural effect and is a technique that is frequently utilized in baking, salads, and toppings.
- Fruits: Some fruits, like apples, can benefit from having a more substantial chop applied to them before being used in salads or salsa.
- Meat: Chopping the meat is required when making dishes like tartare as well as when preparing a mixture of ground meat for a variety of recipes.
Techniques for Achieving Different Chop Sizes
- Rough Chop: This entails chopping the ingredients into large, irregular pieces that are suitable for cooking rustic dishes such as stews or chunky salsas.
- Medium Chop: Pieces of medium size are a little bit larger than a rough chop, and they can be used in soups, stir-fries, and other dishes where an even distribution of texture is desired.
- Fine Chop: This technique requires the ingredients to be cut into small, even pieces, and it is frequently used for garnishes, sauces, or other applications in which a more integrated flavor is desired.
- Uniform Chop: Achieving a consistent size helps ensure even cooking and is commonly used in situations where appearance is very important, such as in salads.
Recipes that Benefit from the Chop Technique
- Vegetable Stir-Fry: When vegetables are chopped into pieces of medium size, they can be cooked more quickly and evenly while still retaining their satisfying crunch.
- Salsa Fresca: A chunky and flavorful salsa can be made by roughly chopping ingredients like tomatoes, onions, and cilantro.
- Chicken Noodle Soup: The texture of the soup is improved by the addition of chopped carrots, celery, and onions, and the flavor is enhanced by the fine chopping of various herbs.
- Chopped Salad: A salad that is both visually appealing and delicious can be made by combining various toppings, greens, and vegetables that have been chopped in the same manner.
- Stir-Fried Tofu with Vegetables: This speedy stir-fry features tofu and vegetables that have been chopped into bite-sized pieces and are all of the same sizes.
Your culinary creations will have more dimension and texture once you have mastered the chopping technique, which allows you to bring out the best in a wide variety of ingredients.
Puree Technique
Definition and Significance of Pureeing
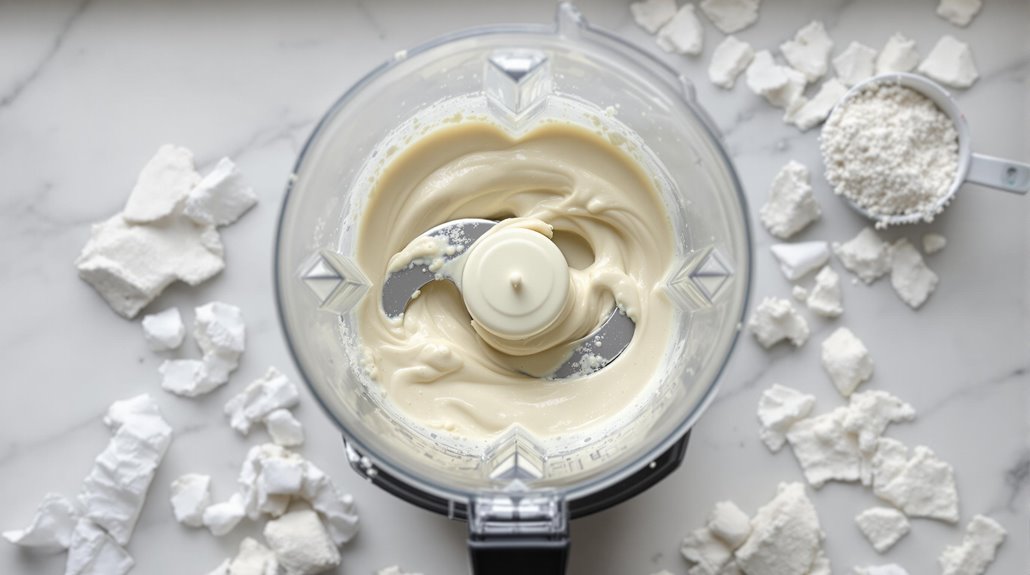
The process of blending or processing food ingredients into a uniformly smooth consistency is referred to as pureeing. Pureeing is a technique used in the culinary arts. The ability of pureeing to transform solid ingredients into a creamy, silky, and consistent texture is the key to understanding the significance of this technique. This method is frequently utilized in the preparation of sauces, soups, baby food, and a wide variety of other dishes that call for a smooth consistency.
Ingredients Suitable for Pureeing
Many ingredients are suitable for pureeing, including:
- Vegetables: Carrots, peas, squash, and tomatoes are some examples of such foods.
- Fruits: When making smoothies, sauces, or desserts, it is common practice to puree various fruits such as berries, mangoes, bananas, and avocados.
- Legumes: Dips such as hummus can be made by puréeing legumes like chickpeas, beans, and lentils.
- Meat: Meats that have been cooked and then pureed, such as beef or chicken, can be used as a base for sauces or as baby food.
- Grains: Creating a creamy texture in a dish can be accomplished, in some cases, by pureeing cooked grains such as rice or quinoa.

Achieving the Desired Consistency in Purees
To achieve the desired consistency when pureeing, consider the following tips:
- Preparation: Before beginning the process of pureeing, make sure that the ingredients have been cooked or otherwise prepared to make them easier to blend.
- Equipment: For pureeing that is both effective and silky smooth, make use of a high-quality blender, food processor, or immersion blender.
- Liquid Additions: To make the blending process easier and to achieve the desired consistency, add liquids such as chicken broth, water, or milk.
- Batch Size: To prevent uneven blending and prevent the blender from becoming overloaded, it is best to work in batches, especially when working with larger quantities.
- Scraping Down: Make sure that all of the ingredients are incorporated into the mixture by pausing the blending process at regular intervals and scraping down the sides of the container.
Recipes Showcasing the Versatility of the Puree Technique
- Roasted Red Pepper and Tomato Soup:
- To make a velvety and reassuring soup, simply puree roasted red peppers and tomatoes.
- Spinach and Feta Stuffed Chicken Breast with Basil Puree:
- To enhance both the taste and the appearance of the stuffed chicken, you can make a vibrant basil puree and serve it alongside the chicken.
- Butternut Squash and Sage Risotto:
- The butternut squash can be cooked and then pureed to add a velvety texture to the risotto, which will improve both the flavor and the consistency.
- Mango Raspberry Smoothie:
- A fruit smoothie that is both reviving and velvety can be made by blending mango and raspberries with yogurt.
- Garlic and White Bean Hummus:
- Create a smooth and flavorful hummus by combining cooked white beans, garlic, lemon juice, and olive oil in a food processor or blender.
Mastering the puree technique allows you to improve the texture and presentation of a variety of dishes, opening up a wide range of possibilities in the kitchen.
Blend Technique
Overview of Basic Blending and its Role in Various Recipes
Blending is a technique that involves combining different ingredients to produce a consistent mixture. Blending is typically done with a food processor or blender. This method is the cornerstone of a great number of recipes and is essential to achieving silky textures, consistent flavors, and well-integrated combinations. The blending process is extremely flexible and can be utilized in the preparation of savory as well as sweet foods, such as soups, sauces, smoothies, and desserts.
Tips for Achieving a Smooth and Consistent Blend
To achieve a smooth and consistent blend, consider the following tips:
- Preparation: Before beginning the blending process, make sure that the ingredients have been properly prepared, whether that entails chopping, cooking, or simply softening them.
- Liquid Placement: To make the process of blending easier and to ensure that the blades can easily incorporate all of the ingredients, start the blending process by placing liquids at the bottom of the blender.
- Batch Size: Avoid putting too much into the blender at once; if necessary, work in batches to get a smooth consistency.
- Pulse Technique: Before moving on to continuous blending for a smoother texture, you should begin by breaking down larger pieces with the pulse function, which the blender provides.
- Scraping Down: Make sure that all of the ingredients are incorporated into the mixture by pausing the blender at regular intervals and scraping down the sides of the container.

Recipes Where Blending is a Key Step
- Creamy Tomato Basil Soup:
- Create a silky and flavorful soup by blending ingredients such as tomatoes, basil, and other ingredients.
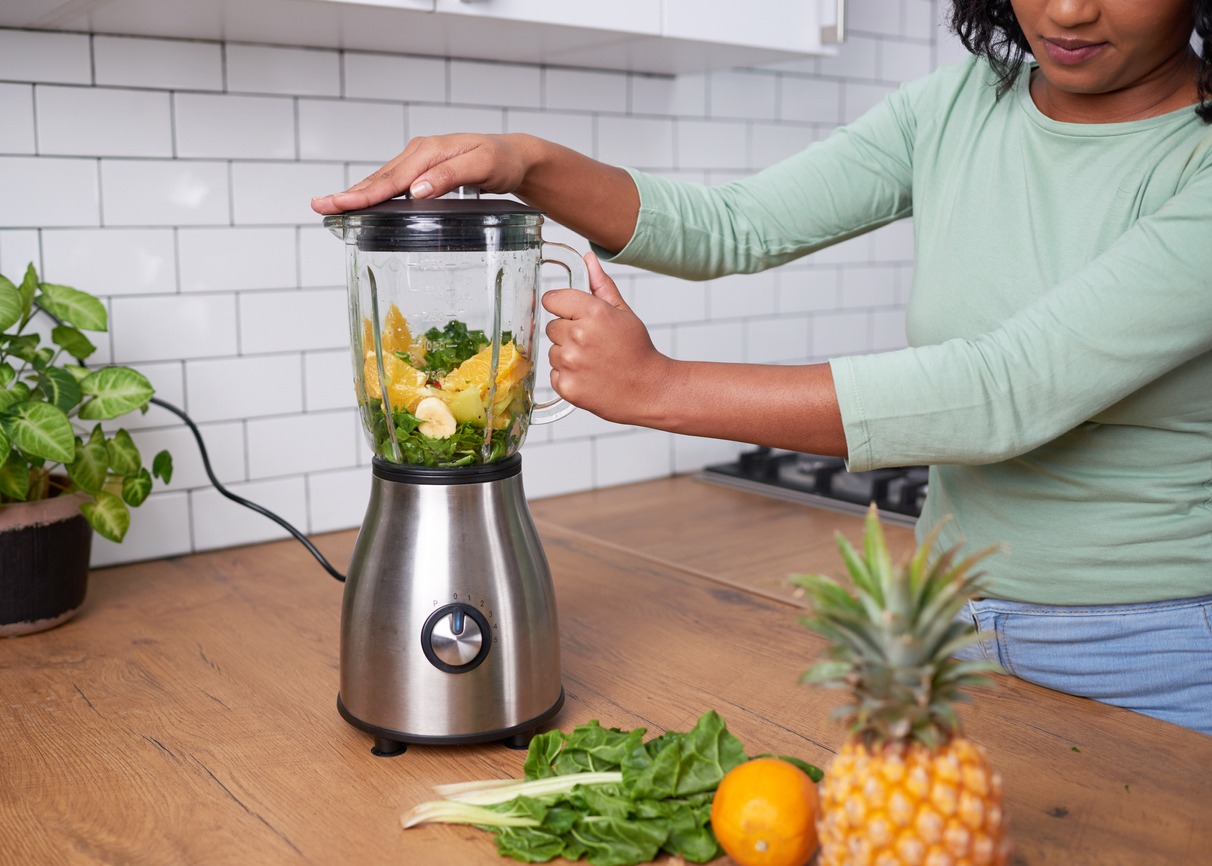
- Green Smoothie:
- Make a nutritious and refreshing smoothie by blending a variety of leafy greens, fruits, and yogurt, and topping it off with ice.
- Classic Vinaigrette:
- To make a velvety and emulsified vinaigrette that can be used for salads, combine ingredients such as olive oil, vinegar, mustard, and herbs in a blender.
- Hollandaise Sauce:
- Hollandaise sauce is made by beating together egg yolks, melted butter, and lemon juice until it becomes thick and velvety.
- Chocolate Avocado Mousse:
- To make a velvety and decadent chocolate mousse, simply combine ripe avocados, cocoa powder, your preferred sweetener, and vanilla extract in a blender.
- Peanut Butter Banana Smoothie Bowl:
- A base for a smoothie bowl can be made by blending frozen bananas, peanut butter, and milk in a blender. The resulting mixture should be thick and smooth.
- Roasted Red Pepper Hummus:
- To make a hummus that is full of flavor and silky smooth, simply combine roasted red peppers, chickpeas, tahini, garlic, and lemon juice in a food processor.
The ability to blend ingredients is an essential and versatile skill in the kitchen. It allows for the creation of a wide variety of dishes that each have their unique flavors and textures. Having a firm grasp on this method frees you to explore new avenues of creativity and originality in your culinary endeavors.
Crush Ice and Frozen Ingredients
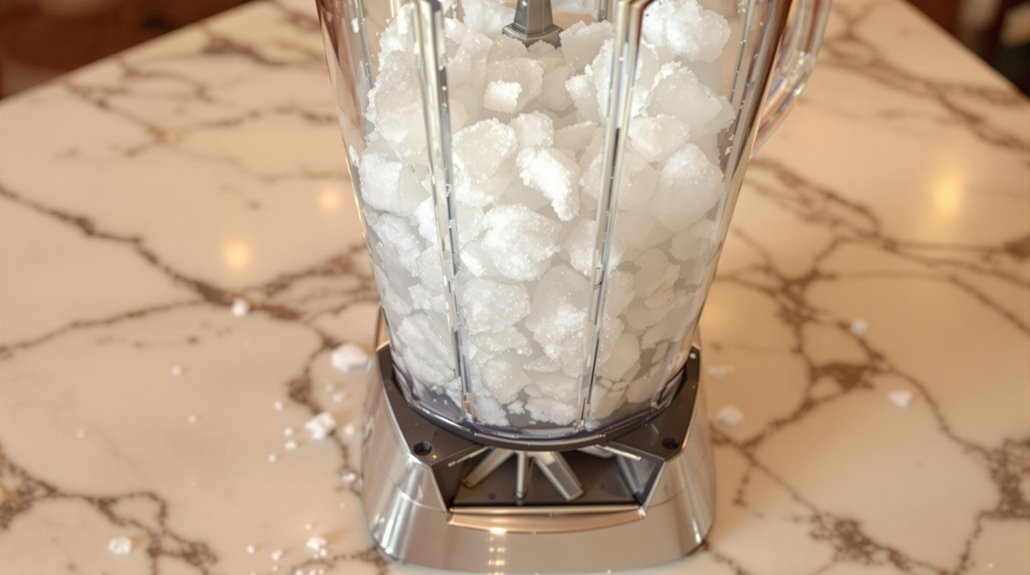
Techniques for Safely Crushing Ice in a Blender
Crushing ice in a blender can be done safely with the following techniques:
- Use a Powerful Blender: Check that your blender has a motor that is strong enough to handle the task of crushing ice. Blenders that have high speed and strong blades are the most effective tools for this job.
- Add Liquid: When you are crushing ice, you should add a very small amount of liquid, such as water or juice. Because of this, the blades can move more freely, and they won't get stuck as easily.
- Use the Pulse Function: Before moving on to the continuous blending mode, you should begin by using the pulse function to crush the ice into smaller pieces. This results in less strain being placed on the motor of the blender.
- Crush in Batches: Crush ice in smaller batches rather than trying to do it all at once, as this will prevent the blender from becoming overwhelmed. This ensures that the process will be more even and efficient.
- Use Ice Cubes: Ice cubes should be used rather than large blocks of ice whenever it is practical to do so. In most cases, ice cubes are less difficult to crush and blend.
Blending Frozen Fruits for Smoothies and Desserts
Blending frozen fruits requires a similar approach to crushing ice:
- Pre-cut Fruits: Before putting larger frozen fruits like bananas or mangoes into the blender, you should first cut them up into smaller chunks to improve the blending process.
- Add Liquid: The inclusion of a liquid component, such as yogurt, milk, or juice, assists in the creation of a smoother blend and prevents strain on the blender in the same way that ice does.
- Let Frozen Fruits Thaw Slightly: Before adding frozen fruit to the blender, give it a few minutes to thaw out. This enables the blender to more easily break them down into smaller pieces.
- Use a Tamper (if applicable): While you are blending the frozen fruits, use the tamper, if it comes with your blender, to gently press down on them. This prevents the motor from becoming overworked while maintaining a consistent blend.

Creative Recipes Incorporating Crushed Ice and Frozen Ingredients
Frozen Berry Smoothie:
- To make a revitalizing and refreshing smoothie, combine a variety of frozen berries with yogurt, honey, and a splash of orange juice, and then blend the ingredients.
- Mango Pineapple Sorbet:
- You can make a tropical sorbet that does not contain any dairy products by blending frozen mango and pineapple chunks with a little bit of coconut water.
- Iced Coffee Frappe:
- To make a deliciously refreshing iced coffee frappe, crush ice and blend it with strong brewed coffee, milk, and sweetener.
- Pina Colada Slush:
- A tropical and icy Pina Colada slush can be made by blending crushed ice, pineapple chunks, coconut cream, and a dash of rum in a blender.
- Frozen Banana Ice Cream:
- To make a delicious and nutritious banana ice cream, simply blitz frozen banana slices with a little bit of vanilla extract in a blender.
- Mint Chocolate Chip Smoothie:
- To make a nutritious and delectable smoothie, crush some ice and blend it with a frozen banana, some frozen spinach, some mint leaves, and some chocolate chips.
- Watermelon Granita:
- To make a tasty and refreshing watermelon granita, simply combine frozen watermelon cubes, lime juice, and a touch of sugar in a blender, then freeze the mixture and scrape it with a fork.
You can make a wide variety of delightful and cool recipes by becoming proficient in the techniques for crushing ice and blending frozen ingredients. These recipes are excellent for hot days or as a treat because they are refreshing.
Grinding and Milling
Using the Blender for Grinding Spices, Grains, and Nuts
Blenders are multipurpose tools that can be used for grinding a variety of ingredients. The process of grinding spices, grains, and nuts can be accomplished with the help of a blender.
- Spices: To get a coarse grind with whole spices like cumin seeds, coriander seeds, or peppercorns, you should use the pulse function on your food processor. To make sure the grinding is even, you should pause and scrape down the sides.
- Grains: To keep the blender from getting too hot, only grind cereal grains like rice or oats in short bursts. Run the ground grains through a sieve to get rid of any larger particles and achieve a finer consistency.
- Nuts: When grinding nuts, you should begin by giving the nuts short pulses to help break them up. Processing them too much will turn them into nut butter, so try to avoid doing that. Check that everything is consistent, and do it again if necessary.
Tips for Achieving the Right Texture when Milling Ingredients
Achieving the right texture when milling ingredients in a blender requires attention to detail:
- Batch Size: When grinding ingredients, do so in smaller batches to ensure an even grind and to prevent the blender from becoming overloaded.
- Dry Ingredients: Before beginning the milling process, check to see that all of the ingredients are dry. The texture can be altered by the presence of moisture, which can also cause clumping.
- Pulse Technique: For increased control, make use of the pulse function. This stops the blender from getting too hot and enables you to check the consistency of the mixture in between pulses.
- Sieve or Sift: Sieve or sift the ground material to remove larger particles and achieve a smoother consistency. This step is especially important when milling grains, which results in coarser textures.
- Chill Ingredients: Chilling the ingredients, such as nuts or seeds, before milling them can help prevent the ingredients from turning into a paste as a result of the heat generated during the milling process.

Recipes that Benefit from Freshly Ground Ingredients
- Homemade Spice Blends:
- When making your custom spice blends for curry or rub, grinding whole spices like cumin, coriander, and cardamom is the first step.
- Oat Flour Pancakes:
- Oats can be rolled in a mill to produce oat flour, which can then be added to pancake batter to impart a nutty flavor and a hearty texture.
- Almond Meal Cookies:
- Almond meal can be made by grinding almonds into a powder and then using it in gluten-free cookie recipes.
- Freshly Ground Coffee:
- If you want a cup of freshly brewed coffee that's full of flavor and aroma, grind some whole coffee beans in the blender first.
- Chia Seed Pudding:
- For a novel take on chia seed pudding that incorporates a crunchier component, mill the chia seeds until they reach a texture similar to coarse sand.
- Whole Wheat Bread:
- Run grains of whole wheat through a mill to produce whole wheat flour, then use it to bake bread that is good for you.
- DIY Nut Butter Blend:
- Make your one-of-a-kind nut butter by pulverizing a variety of nuts, such as peanuts, cashews, and almonds, in a food processor.
You can improve the flavors and textures of your dishes as well as add a touch of individuality to your culinary creations by using ingredients that have been freshly ground and incorporating them into your recipes.
Conclusion
In this article, we looked at several key blender techniques that are necessary for culinary success. We learned about pulsing, mastering the chopping technique, and achieving smooth and consistent blends, which included crushing ice and blending frozen ingredients. We also talked about the versatility of the puree technique and the practicalities of grinding and milling different ingredients. Each technique contributes something unique to the enhancement of flavors, textures, and overall culinary experiences.
It is best to embrace experimentation and get creative with these blender techniques as you begin your culinary journey. Don't be afraid to experiment with new flavor combinations and create your signature blends. The blender is a versatile tool that can take your cooking to new heights and allow you to express your unique cooking style.
Finally, mastering blender skills is a critical component of culinary success. Whether you're a seasoned chef or a novice home cook, knowing how to use a blender effectively opens up a world of possibilities in the kitchen. These techniques enable you to make everything from textured salsas to silky purees, enhancing the appearance of your dishes. So, take advantage of the opportunity to hone your skills, try out new ideas, and let the blender be your ally in creating delicious and innovative meals. Mastering these techniques will not only save you time but will also improve the quality and variety of your culinary creations.