You may already use your blender for smoothies or shakes, but its capabilities extend far beyond these simple tasks. A blender can be a vital kitchen tool for a variety of culinary tasks, from grinding spices to making creamy soups and even kneading dough. By utilizing your blender for these functions, you can streamline kitchen processes that usually require separate appliances.
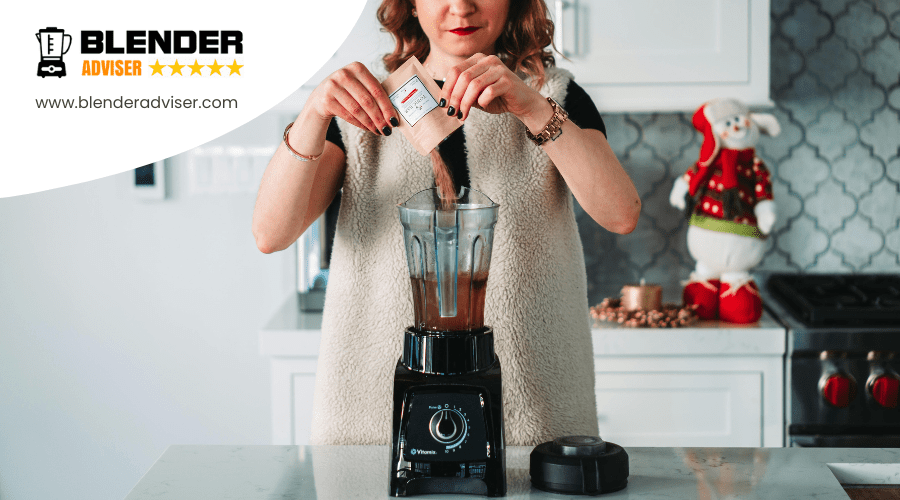
To start, try using your blender to grind fresh spices. Simply add whole spices to the blender and pulse until they reach the desired fineness. This method ensures you get the freshest flavors for your cooking. For making soups, blend cooked vegetables with stock in your blender until smooth. This technique allows you to create rich, creamy soups without the need for cream or additional thickeners.
If you’re into baking, your blender can also assist in preparing dough. Combine the wet and dry ingredients for your dough in the blender and mix until just combined. This can save time and reduce the effort typically required in manual kneading. Exploring these additional uses of your blender not only maximizes its utility but also enhances your cooking efficiency. Consider how incorporating your blender into more cooking tasks could simplify your meal preparation.
Key Takeaways
- Use blenders to make smoothies, puree soups, and crush ice for drinks. They handle these tasks quickly and efficiently.
- Blenders also grind dry ingredients, such as grains and coffee beans, into fine powders.
- With the addition of accessories like tampers and extra blades, blenders can also prepare dough and make nut butters.
- Adjustable pulse and speed settings provide precise control, making it easy to chop vegetables and emulsify dressings.
- To keep your blender in top shape, perform regular maintenance. This includes cleaning and taking care of the blades, which helps ensure its longevity and effective performance across various kitchen tasks.
How Do Blenders Work?
If you’re curious about how your blender works so effectively, here’s a straightforward explanation. The blender operates with a robust motor that causes sharp blades to rotate rapidly. This swift action creates a vortex, drawing ingredients towards the blades for uniform blending. The shape of the blender jar ensures that all contents are directed right into the path of these blades. For added functionality, consider using different accessories designed for specific blending tasks. This setup allows you to make everything from smoothies to soups quickly and with ease.
Motor
Blenders are equipped with a motor that spins sharp blades quickly, enabling effective blending, chopping, and pureeing of ingredients. The motor’s performance is crucial to how well your blender works. You can change the motor’s speed to suit the dish you’re making, achieving the right texture, from smooth purees to chunky salsas.
- Powerful Motor: Necessary for crushing ice and processing frozen fruits.
- Speed Settings: These settings let you adjust the texture of your ingredients.
- Efficient Blending: The motor generates a vortex that directs ingredients toward the blades for better blending.
- Versatility: A strong motor allows the blender to perform various tasks, like making smoothies or grinding nuts.
To get the most out of your blender, start by selecting the appropriate speed setting for the task. For instance, use lower speeds for chunky textures and higher speeds for smoother results. Always make sure the blender is properly assembled and the lid is secure before starting to avoid any mishaps. Regular maintenance, such as checking the blades for dullness and ensuring the motor is not overloaded, will extend the lifespan of your blender and enhance its performance.
Blades

Stainless steel blades are key components of any blender, designed to rotate at high speeds to effectively crush, blend, and puree a variety of ingredients. Made from durable stainless steel, these blades are built to last and are sharp enough to finely process everything from ice to fibrous vegetables, ensuring a smooth final product.
The placement of blender blades is crucial as it creates a vortex that draws ingredients toward the blades for even mixing. This helps prevent lumps and ensures a consistent texture in your blends. By understanding the role of these blades and their strategic placement, you can better utilize your blender for a range of recipes, improving your culinary results.
When using your blender, always ensure the blades are properly assembled and the lid is securely fastened to avoid spills and accidents. Regular cleaning and maintenance of the blades will also preserve their sharpness and functionality, enhancing your blending experience.
Containers
Blenders typically include standard containers suitable for everyday tasks such as making smoothies and soups. If you handle dry ingredients like grains or spices, consider purchasing a dry grains container. These are specifically engineered for grinding dry materials into a fine powder, enhancing your baking and cooking projects. Additionally, using color-coded containers can streamline your ingredient organization and introduce a stylish element to your kitchen setup. Choose containers that meet your specific needs to optimize your blending experience.
Blender containers, crafted from robust glass or strong plastic, are essential for securely holding your ingredients while blending.
- Use measurement markings for precise ingredient portions.
- Detachable blades simplify cleaning.
- Secure lids help avoid spills during use.
- Be aware that containers vary in durability and resistance to heat.
Choose materials based on your specific needs and handle them with care for safe, efficient blending.
Standard Containers
To enhance your blending experience, it’s important to understand the function of standard blender containers. Here are some practical steps:
- Blender jars are specifically shaped to form a vortex that efficiently directs ingredients towards the blades at the base.
- Always start by adding liquids, which helps ensure smooth blending and protects the motor.
- Adjust the blender’s speed settings to fine-tune the texture of your blend.
- For optimal results, look for blending tips that are specific to your blender model.
Dry Grains Containers
Blenders equipped with dry grains containers are specifically designed for processing hard, dry ingredients like grains and seeds. Unlike standard containers, these specialized blenders excel at producing fine flours, freshly ground spices, and smooth nut butters. Their unique blades and construction prevent overheating and damage to the ingredients, ensuring consistent and even results. When using a blender with a dry grains container, start by measuring your ingredients accurately. Load the container by placing larger, harder items at the bottom and lighter materials on top. This arrangement helps in achieving an even grind. Additionally, use the pulse feature to control the texture and prevent clumping. Regular cleaning after each use will maintain the efficiency and longevity of your blender.
Blender Accessories and Add-Ons
To improve your blending capabilities, it’s beneficial to invest in practical accessories and add-ons that address a wide range of culinary tasks. Choosing the right blender accessories enhances the efficiency of blending and broadens the variety of recipes you can create. Accessories such as tamper sticks and personal cup adapters simplify the blending process, delivering smoother results and convenient single servings.
Here’s a breakdown of how various accessories can upgrade your blender:
| Accessory Type | Function |
|---|---|
| Tamper Stick | Pushes ingredients toward the blades |
| Personal Cup Adapter | Facilitates blending in individual servings |
| Additional Blades | Tailored for specific tasks like grinding |
| Specialized Containers | Ideal for dry ingredients like grains |
| Whisk Attachment | Adapts blender for tasks like mixing and whipping |
Investing in these tools will significantly enhance your blending capabilities, making it easier to tackle a wider array of dishes.
You Are in Control
When operating a blender, you have complete control over the outcome. Choose between dial controls for fine adjustments or button controls for rapid changes, depending on your needs. This flexibility is crucial for achieving the desired texture and consistency in your blends. Use this control to precisely adjust your recipes to meet your specific taste preferences.
Dial Controls
Dial controls on blenders allow for precise adjustments in speed and power, making them ideal for a variety of blending tasks. These controls offer customizable settings, enabling you to fine-tune the blender’s performance to efficiently handle different ingredients, from soft fruits to tough nuts.
Key features of blenders with dial controls include:
- Customizable Settings: Adjust the speed to suit any type of ingredient. This flexibility helps achieve the perfect texture, whether you’re blending soft items or grinding hard ones.
- Preset Programs: Use these pre-defined settings for common tasks such as crushing ice or preparing smoothies. These programs simplify the blending process, allowing for consistent results with minimal effort.
- Tough Ingredients: Increase the power to easily break down hard-to-blend items. This capability ensures that even the most challenging ingredients can be processed smoothly.
- User-Friendly Interface: The controls are designed to be intuitive, making it easy for anyone to operate the blender effectively.
When using a blender with dial controls, start by selecting the appropriate setting for your specific blending needs. For tougher ingredients, gradually increase the power to prevent overloading the motor. Utilize the preset programs for routine tasks to save time and ensure uniformity in your results. By following these steps, you can maximize the efficiency and lifespan of your blender.
Button Controls
Button controls on blenders provide a precise way to manage your blending tasks. These controls allow you to easily switch between different speed settings to achieve the desired consistency, from chunky salsa to smooth smoothies. The pulse function is useful for chopping ingredients briefly without over-blending. Blenders with pre-programmed settings simplify common tasks, such as making soups, sauces, or frozen drinks. Simply select a program and let the blender do the work, ensuring consistent results every time. This straightforward approach to blender operation enhances your kitchen efficiency and helps you create perfect dishes with minimal effort.
Blender Safety
When operating your blender, prioritize safety, particularly when cleaning. Ensure you load the container properly to prevent spills and achieve consistent blending results. Additionally, always ensure the area is well-ventilated while using the blender to avoid motor overheating, which helps extend the lifespan of your appliance.
Careful Cleaning

To ensure your blender stays in optimal condition, it’s crucial to clean it properly after every use. Regular cleaning not only maintains its efficiency but also extends its lifespan, particularly if you use your blender often. Follow these straightforward steps to maintain your blender:
- Disassemble and rinse: Right after use, take apart your blender and quickly rinse each component to wash away any remaining food bits.
- Clean with warm, soapy water: Thoroughly scrub the container, lid, and blades using warm, soapy water. This step helps prevent the build-up of residues.
- Dry thoroughly: Make sure all parts are fully dry before you put the blender back together. This prevents any damage from moisture or the growth of mold.
- Inspect regularly: Every time you clean, examine the blender for any signs of wear or damage that might impact its performance or safety.
These measures will keep your blender functioning well and ready for its next use.
Loading the Container
To ensure efficient blending, distribute your ingredients uniformly in the blender. Start with softer items at the bottom and add harder items on top. This approach helps the blender blades first mix the soft items, forming a liquid base that facilitates the blending of harder items. Avoid overfilling the blender to prevent spills and ensure an even mix. Always secure the lid tightly before operation to avoid accidents. Following these steps will help you blend ingredients smoothly and safely, enhancing your cooking experience.
Proper Ventilation
After securing the lid as previously described, it’s crucial to ensure that your blender is well-ventilated to operate efficiently and safely. Adequate airflow prevents overheating, protecting the motor and extending the appliance’s life.
Here are actionable steps to maintain optimal ventilation:
- Position your blender strategically: Place it in an open area, clear from walls and other appliances to facilitate free air movement around it.
- Regularly clean vents: Remove dust and debris that can clog vents and impede airflow.
- Keep the blender uncovered during use: Avoid placing cloths or other items on the blender while it is operating.
- Choose blenders with effective ventilation: Select models designed with superior ventilation features to enhance motor cooling and performance.
TroubleShooting
If your blender is shaking, vibrating, or not turning on, there are several steps you can take to address these issues. Start by ensuring the blender is properly assembled; an incorrectly fitted blade or loose base can cause shaking and leaking. Check that the lid is sealed tightly to prevent leaks.
If the blender won’t turn on, verify that it’s plugged into a working outlet and the power cord is intact. For blenders that emit a high-pitched noise, this could indicate a motor issue or that the blades are obstructed. Carefully inspect and clean the blade assembly, removing any debris that could hinder performance.
Regular maintenance, such as tightening loose components and cleaning after each use, can prevent many common blender problems. If these steps do not resolve the issue, consult the manufacturer’s manual or contact customer service for further guidance.
My blender is shaking and vibrating
If your blender begins to shake and vibrate, ensure it’s on a stable, flat surface. This issue is often simple to fix with basic checks and adjustments.
Follow these practical steps:
- Verify the Surface: Make sure the surface under your blender is level and firm.
- Check the Blender’s Base: Ensure the base is not uneven or loose, which can lead to instability.
- Avoid Overloading: Do not fill the blender beyond its capacity as this can cause excessive shaking.
- Inspect the Blades: Examine the blades and container for any misalignment or damage that could be causing the problem.
These steps should help stabilize your blender and reduce any shaking or vibrating.
My blender isn’t turning on
First, ensure your blender is plugged into a functioning outlet. Inspect the power cord for signs of damage or wear. If it appears intact, check that the blender jar is properly aligned and seated on the base, as a misalignment can prevent the machine from operating for safety reasons. If these checks don’t resolve the issue, try pressing the reset button or examine your home’s circuit breaker to see if it has tripped. If the blender still does not turn on, contact the manufacturer’s customer service for further assistance or to explore warranty options. They can provide additional troubleshooting steps specific to your model.
My blender is leaking around the lid or the base
Ensure the rubber gasket on your blender’s lid is clean and free from any food particles or debris that could cause a leak. Maintaining a clean seal is essential to prevent leakage. Follow these steps for further troubleshooting:
- Make sure the blender lid is tightly secured to the container. A loose lid can cause spills.
- Check the blender base for any signs of cracks or damage that might contribute to leaks.
- Inspect the container, especially around the seal area, for any cracks that could allow liquids to leak.
- If the leakage continues, contact the manufacturer’s customer service for assistance and possible replacement parts.
These actions will help address and potentially resolve the leaking issue with your blender.
My blender is making a high-pitch screech
If your blender is making a high-pitched screech, it might be due to a problem with the motor or blade assembly. Start by checking for any loose parts or debris that could be causing the noise. It’s also possible that the blender is overloaded, which puts extra stress on the motor. Try using fewer ingredients to see if the noise decreases. If the blender is used continuously for long periods, it may also produce a screeching sound. If the noise continues, consider contacting the manufacturer or a professional for an inspection and possible repair. Regular maintenance and correct use are essential to avoid future problems and ensure your blender operates efficiently.
The Art of Blending
When mastering the art of blending, one practical skill is crushing ice for cocktails and smoothies. To achieve this, ensure your blender is powerful enough to handle ice without damage. Blending soups directly in the pot is another efficient technique. Simply add your chunky ingredients and blend until smooth. This method is not only quick but also minimizes cleanup. For each task, whether making smoothies or pureeing soups, a blender proves essential. Ensure to familiarize yourself with your blender’s various functions to fully utilize its capabilities in your kitchen tasks.
Crushing Ice
To effectively crush ice in a blender, ensure your appliance is equipped with a robust motor and sharp blades. This functionality is essential not only for chilling beverages but also for preparing smoothies, cocktails, and other frozen delicacies. Follow these straightforward steps to achieve optimal results:
- Incorporate a Small Amount of Liquid: Adding a bit of liquid facilitates a smoother blending process.
- Utilize the Pulse Feature: Use this function to prevent the blender’s motor from overheating and to maintain optimal performance.
- Avoid Overfilling: Fill the blender to a manageable level to prevent overburdening the motor and ensure efficient blending.
- Consume Promptly: For best taste and freshness, serve your creations immediately after blending.
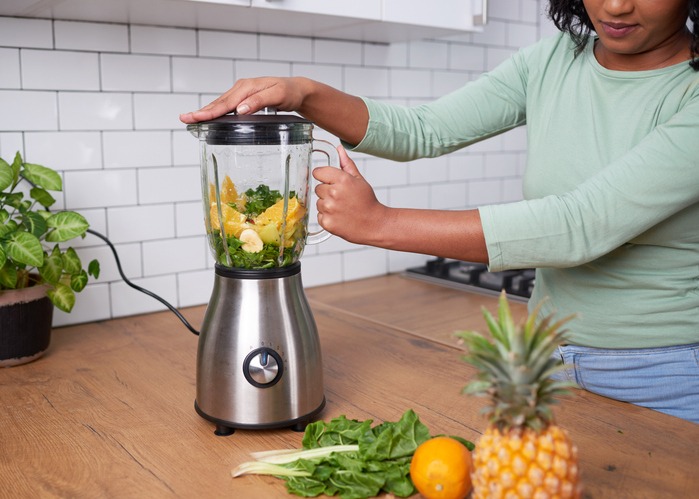
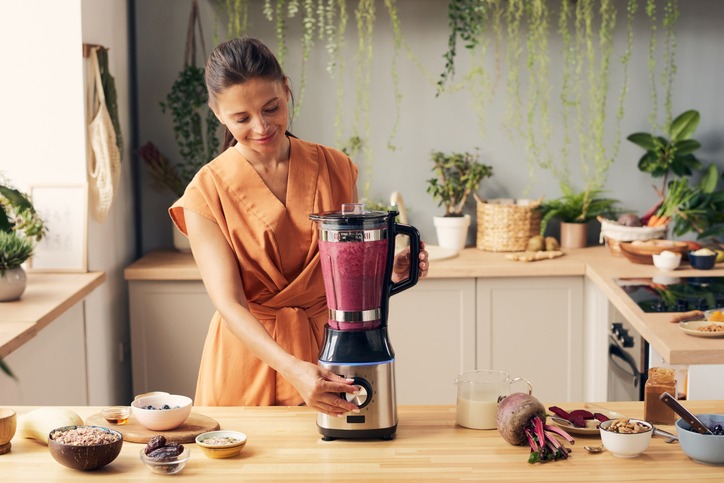
Making Smoothies
Creating smoothies is a practical way to mix various nutritious ingredients into a single, tasty, and easy-to-consume drink. Start by using a blender to mix a range of fruits and vegetables, including leafy greens and frozen items, to make refreshing frozen beverages. The key advantage of smoothies is their adaptability; you can customize them to meet your specific health objectives or taste preferences.
To achieve the ideal smooth, creamy texture that enhances the appeal of smoothies, a good blender is essential. It effectively breaks down the fibers in fruits and vegetables, helping your body to absorb the nutrients more efficiently. Smoothies are an excellent option for a quick breakfast or a post-exercise recovery drink. Simply choose your ingredients, blend until smooth, and enjoy a nutrient-packed drink that supports your health and wellness goals.
Blending Soups

Blending soups using a kitchen blender turns basic ingredients into smooth, comforting dishes efficiently. Start by pureeing soft, cooked vegetables, herbs, and broths to achieve the desired soup texture. Whether preparing a robust tomato soup or a refreshing chilled soup for warmer weather, your blender is up to the task.
Here are essential tips for blending soups:
- Begin with soft, thoroughly cooked ingredients to ensure a smooth puree.
- Increase the blender’s speed gradually to avoid splatters and to create a uniform texture.
- Utilize the pulse feature to fine-tune the soup’s consistency.
- If blending hot soups, confirm that your blender can handle the heat, or allow the soup to cool slightly before blending.
Follow these straightforward guidelines to efficiently create delicious blended soups at home.
Advanced Blender Techniques
As you delve into advanced blender techniques, it becomes clear that blenders are versatile tools, capable of handling tasks beyond blending liquids and soft fruits. They are excellent for grinding coffee beans to the perfect coarseness. For making purees, a blender processes various foods efficiently, transforming them into smooth, creamy textures ideal for soups and sauces. Additionally, blenders can chop vegetables effectively, making them a handy tool for preparing ingredients for salsas or salads.
Moreover, your blender can assist in preparing dough for fresh bread, streamlining the baking process. Another valuable use is juicing whole fruits and vegetables, which provides a quick and easy way to consume essential nutrients. By utilizing your blender for these tasks, you enhance your culinary skills and expand the appliance’s utility in your kitchen.
Grinding
Transform tough ingredients like nuts and coffee beans into fine textures with your blender’s pulsing function or specific grinding settings. Blenders, with their high-powered motors and sharp blades, can be more effective than traditional food processors for grinding dry goods. This method is quick, preserves freshness, and enhances flavor, making it ideal for creating smooth sauces.
- Layer ingredients strategically: Place larger, harder items at the bottom of the blender.
- Use the pulse feature: This helps control the texture and prevents the blender from overheating.
- Avoid overfilling: Fill the blender container only about halfway to ensure even grinding.
- Grind in batches: This maintains consistency and prevents overworking the blender motor.
These steps will help you achieve the best results when using your blender for grinding.
Food Processing
Expanding on the basic grinding capabilities of blenders, advanced techniques allow you to prepare a variety of foods such as nut butters, homemade flours, and baby food. Using a blender for more than just smoothies enables you to enhance your cooking skills.
For instance, you can make emulsifying dressings easily. Simply combine oil, vinegar, and your preferred seasonings in the blender and mix until smooth, ensuring your salads are consistently well-dressed with a silky texture.
Preparing homemade baby food is also straightforward. Select quality fruits, vegetables, and grains, and blend them to a smooth consistency suitable for your baby. This method allows you to manage the ingredients and ensure they are healthy and safe.
Chopping
Blenders are effective tools for quickly chopping ingredients like vegetables and nuts. To ensure the perfect consistency for your recipes, use the pulse function. This method saves time and ensures that items such as salsas and salad toppings are chopped finely and uniformly with minimal effort. Follow these steps to improve your chopping technique with a blender:
- Pulse in Short Bursts: To prevent over-processing, pulse the ingredients in short bursts.
- Add Ingredients Gradually: To achieve even chopping, introduce your ingredients gradually.
- Use Sharp Blades: Ensure the blender’s blades are sharp for effective chopping.
- Adjust Speed Settings: Use the blender’s variable speed settings to control the chop’s fineness.
Making Dough
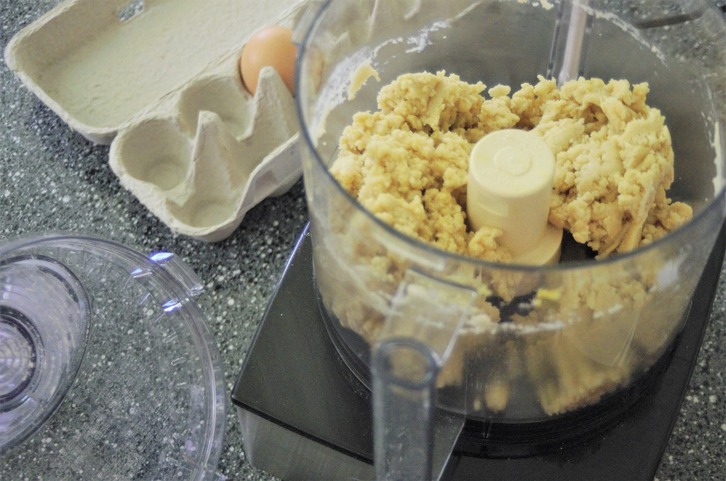
Using a blender to make dough simplifies the process, particularly when you want a crumbly texture perfect for pastries or biscuits. To achieve this, add liquid slowly and use the pulse function. This method helps avoid overmixing, preserving the dough’s desired flaky texture. Blenders are not just for smoothies or sauces; they are also effective for making small batches of dough efficiently, which saves time and effort.
| Task | Benefit |
|---|---|
| Pulse Cold Butter | Prevents gluten formation |
| Add Olive Oil | Enhances flavor |
| Gradual Liquid Add | Controls consistency |
When making dough in a blender, start by pulsing cold butter to avoid gluten development, which keeps the dough tender. Adding olive oil not only boosts flavor but also contributes to the texture. Carefully adding liquid in stages allows you to manage the dough’s consistency effectively, ensuring it doesn’t become too wet or dry.
Juicing
Exploring the versatility of blenders, we’ve seen how they simplify dough preparation. Now, let’s focus on their ability to create nutritious juices from fruits and vegetables. Beyond smoothies, blenders are excellent for juicing. Begin by chopping your ingredients on a cutting board, then place them into the blender. Here are some practical tips to enhance your juicing process:
- Add ice to cool and thicken your juice.
- Pour warm water into the blender until it is half full to ensure a smooth blend.
- Create oat flour from leftover grains with your blender for an added fiber boost.
- Blend thoroughly to extract maximum fiber and nutrients from your ingredients.
These steps will help you maximize the use of your blender in making fresh, healthy juices.
Blending Tips and Tricks for the Best Results
For optimal results when using your blender, learning to use the tamper correctly is crucial. Ensure that the blades are fully covered by the ingredients to guarantee a uniform blend and prevent any blending issues. Additionally, always scrape out all the contents from the blender to fully utilize your ingredients. This approach helps in achieving a smooth, evenly mixed final product every time.
Master the Tamper
To optimize your blender’s performance using the tamper, follow these practical steps to improve the texture and flavor of your blends, particularly when working with dense ingredients:
- Initiate at Low Speed: Start blending at a low setting to ensure all components are evenly mixed before increasing the speed.
- Apply Consistent Pressure: Use steady pressure with the tamper to drive ingredients towards the blades for efficient blending.
- Maintain Movement: Continuously move the tamper throughout the blending process to eliminate air pockets and ensure there are no unblended areas.
- Monitor Temperature: When preparing hot soups, be cautious of steam build-up and ensure there are ways for the steam to escape safely.
These steps will help you use the tamper effectively, enhancing your blending technique for better results in your kitchen.
Cover the Blades
When using a blender for dense ingredients, it is crucial to operate it safely and effectively. Always start by ensuring the lid is securely in place. This prevents spills and promotes a smoother blend. For blending ice and frozen items, a different approach is necessary. To prevent overworking the motor, cover the pieces completely with liquid, which helps to blend evenly. If the blender struggles with these hard items, an effective method is to fill it halfway with warm water and pulse several times. This step helps to break down the items and protects both the blades and the motor.
Prepare the Bits and Pieces
To achieve smoother blends, begin by cutting your solid foods into smaller pieces before placing them in the blender. This step significantly improves the texture of your blended mixture. Here are additional tips to enhance your blending technique:
- Start blending at a low speed to minimize splashing, then increase the speed gradually as needed.
- Ensure the blender lid is firmly secured to prevent spills and accidents.
- Add liquids and softer ingredients first, then add harder, chunkier items. This approach helps in smoother blending.
- Utilize the pulse feature to better control the texture and to mix ingredients evenly without over-processing.
Blender Maintenance
To ensure your blender operates efficiently for years, it’s crucial to maintain and clean it regularly. Begin by promptly rinsing the blending container after use to prevent ingredients from drying and clogging the mechanism, which could become difficult to clean later.
Regular cleaning is essential not only for appearance but also for the blender’s longevity. Disassemble the removable parts and wash them thoroughly. Consult the owner’s manual for detailed instructions specific to your model to ensure you’re covering all necessary steps.
Additionally, using your blender correctly is vital. Adhere to the loading instructions to prevent overloading the motor and use the provided tamper to safely push ingredients toward the blades during blending. This ensures even textures and avoids straining the motor.
Adjust the speed based on the desired texture of your recipes to achieve optimal results and minimize wear on the blades. By implementing these steps, you are not just maintaining your blender; you are ensuring it continues to be a dependable tool in your kitchen.