What Are the Best Ways to Blend Nuts and Seeds?

Blending nuts and seeds is a culinary adventure that combines textures, flavors, and nutritional benefits to create versatile and delicious concoctions. Whether you're crafting smooth nut butters, crunchy granolas, or nutrient-packed energy bars, mastering the art of blending nuts and seeds opens a world of possibilities in the kitchen.
Not only do nuts and seeds offer a wide range of flavors but they also provide essential nutrients like protein, healthy fats, fiber, vitamins, and minerals. Furthermore, breaking them down into smaller particles through blending enhances their digestibility, making it easier for your body to absorb the nutrients they contain.
Let's embark on this flavorful journey and unlock the potential of nuts and seeds through the art of blending.
Choosing the Right Tools
When blending nuts and seeds, the right tools make a significant difference. For making almond flour, a food processor is ideal. It's versatile, efficiently grinding various nuts and seeds to the perfect consistency with its sharp blades and powerful motor. Whereas, a food processor can handle large batches, saving you time and effort.
For smaller quantities, a coffee grinder is a better option. Coffee grinders achieve a fine consistency essential for recipes needing a smooth texture. They're compact and easy to use, making them perfect for quick tasks. On the other hand, manual food choppers provide a hands-on approach, allowing precise control over texture. This is useful for coarser grinds or varied textures in your nut and seed mixes.
Using a Blender
When using a blender for nuts and seeds, choose a model specifically designed for such tasks to ensure effectiveness. Adding a small amount of oil can help achieve a smooth and consistent blend.
Choosing Right Blender
To achieve optimal results when blending nuts and seeds, selecting a high-speed blender with sharp blades and a powerful motor is crucial. It will ensure a fine, consistent texture for almonds, seeds, or other hard nuts. Unlike food processors, which may leave chunks, high-speed blenders excel at producing a smooth, uniform grind.
When choosing a blender, consider one with variable speed settings. This feature allows you to control the texture of your ground nuts or seeds. Another key factor is the container; opt for a durable, BPA-free container to ensure safety and ease of use. Additionally, a blender equipped with a tamper tool can be invaluable, as it helps push down ingredients for consistent blending, preventing the mixture from sticking to the sides.
Here's a quick reference table to help you select the right blender:
| Feature | Benefit |
|---|---|
| High-Speed Motor | Effective grinding of hard nuts/seeds |
| Sharp Blades | Produces fine nut and seed flours |
| Variable Speed Settings | Controls texture of ground ingredients |
| BPA-Free Container | Ensures safe and convenient processing |
| Tamper Tool | Assists in consistent blending |
Optimal Blending Techniques
While using a high-speed blender, begin by pulsing nuts or seeds to break them down before blending continuously. This initial pulsing prevents motor overheating and ensures a finer, more consistent texture. Whether making flour or butter, controlling the blending process is essential.
When creating flour from nuts or seeds, pulse until they reach a coarse meal consistency. Then, blend continuously until a fine powder is achieved, producing smooth, even flour ideal for baking or cooking.
For nut or seed butter, after pulsing, blend continuously while gradually adding a small amount of oil or liquid. This addition facilitates smoother blending and helps achieve a creamy, spreadable texture. Be patient, as it may take several minutes to reach the desired consistency.
Cleaning and Maintenance
After blending nuts or seeds, promptly clean your blender to maintain its performance and longevity. Neglecting this step can result in stubborn residue and potential damage to your appliance.
Blend for a few seconds, then rinse thoroughly. This quick action helps remove sticky nut and seed residues before they harden. Pay special attention to the blades, as nuts and seeds can leave behind oils and particles that can accumulate if not cleaned properly.
Never submerge the base in water, as this can damage the electronic components. Wiping it down keeps it clean without risk. Ensure the gasket is clean and intact. This prevents leaks and stops food particles from getting trapped, which can cause odors or mold.
For proper blender maintenance, store it in a dry place with the lid off to avoid moisture buildup and unwanted smells.
Optimal Blending Speeds
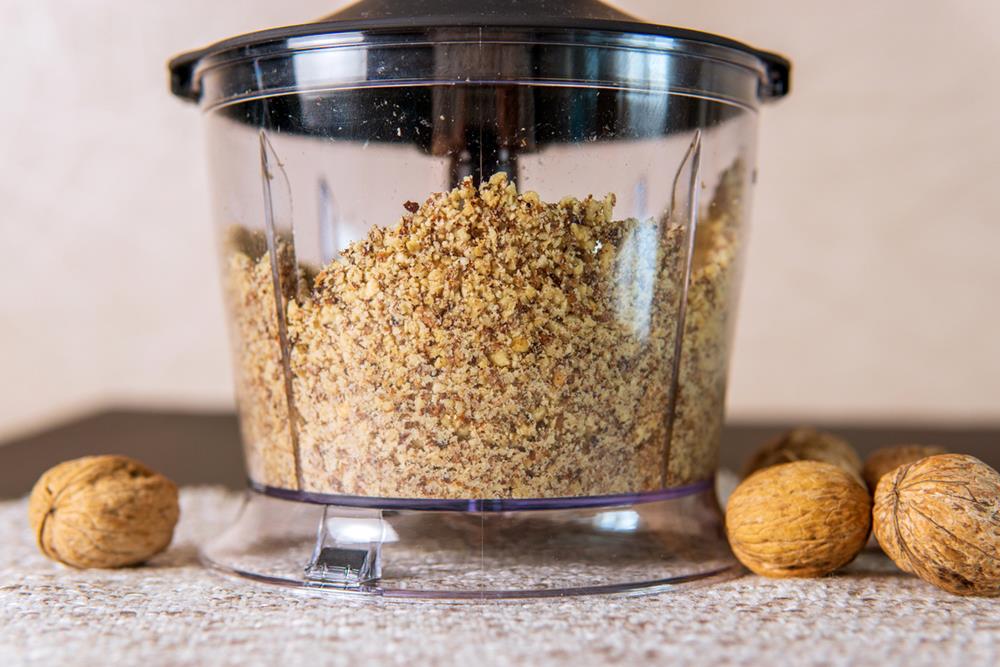
For efficient grinding of nuts and seeds, setting your food processor to a high speed is essential. High blending speeds quickly break down almonds and similar nuts into a fine, smooth texture. Ensure that your food processor blades are sharp to avoid uneven chopping. Gradually increase the blending speed to prevent overheating and to achieve a consistent result.
Pulse Function Benefits
Utilizing the pulse function on your food processor not only allows for the adjustment of blending speeds but also enhances control and consistency when grinding nuts and seeds. This feature is crucial for preventing overheating, thereby preserving the natural oils and flavors of your ingredients.
The pulse function is instrumental in achieving the desired texture without transforming nuts or seeds into a paste. By pulsing in short bursts, you can prevent clumping and ensure an even grind. This technique is particularly useful for creating homemade nut or seed flours, allowing for either a fine or coarse consistency. The table below details the benefits of using the pulse function for various textures and types of nuts and seeds:
| Benefit | Description | Example |
|---|---|---|
| Prevents Overheating | Maintains natural oils and flavors | Almonds, walnuts |
| Controls Texture | Achieves desired consistency without pastiness | Nut flours, seed meals |
| Avoids Clumping | Ensures even grinding | Chia seeds, flaxseeds |
| Versatility | Suitable for both fine and coarse textures | Homemade nut butter, seed flour |
Consistency Achievements
To achieve a fine consistency when processing nuts or seeds, use short, controlled pulses with your food processor. This method prevents over-processing and ensures a powdery texture ideal for blending.
Scrape down the sides of the processor regularly to prevent larger pieces from sticking and to promote uniform blending. Processing small amounts at a time can significantly improve consistency. Overloading the processor may result in uneven blending and a subpar final product. If you're making nut butters, patience is crucial. Experiment with processing times to achieve the desired balance between smoothness and thickness.
Coffee Grinder Method

Using a coffee grinder, you can quickly and efficiently transform nuts and seeds into fine powders, enhancing their flavor and texture. The coffee grinder method is ideal for grinding small batches of nuts and seeds, ensuring a uniform consistency perfect for recipes that require finely ground ingredients.
First, ensure your coffee grinder is clean and dry to avoid any residual coffee or moisture that could alter the taste and texture of your nuts and seeds. Place a small amount of nuts or seeds into the grinder, avoiding overfilling to ensure even grinding. Pulse the grinder in short bursts to prevent overheating and maintain the natural oils in the nuts and seeds, which are crucial for optimal flavor and texture.
It is advisable to use a coffee grinder dedicated exclusively to nuts and seeds to prevent flavor transfer from coffee oils, which can affect the taste of your ground nuts and seeds. By allocating a grinder solely for this purpose, you ensure a pure, uncontaminated result every time.
Give it a try and savor the enhanced flavors in your culinary creations!
Knife Chopping Tips
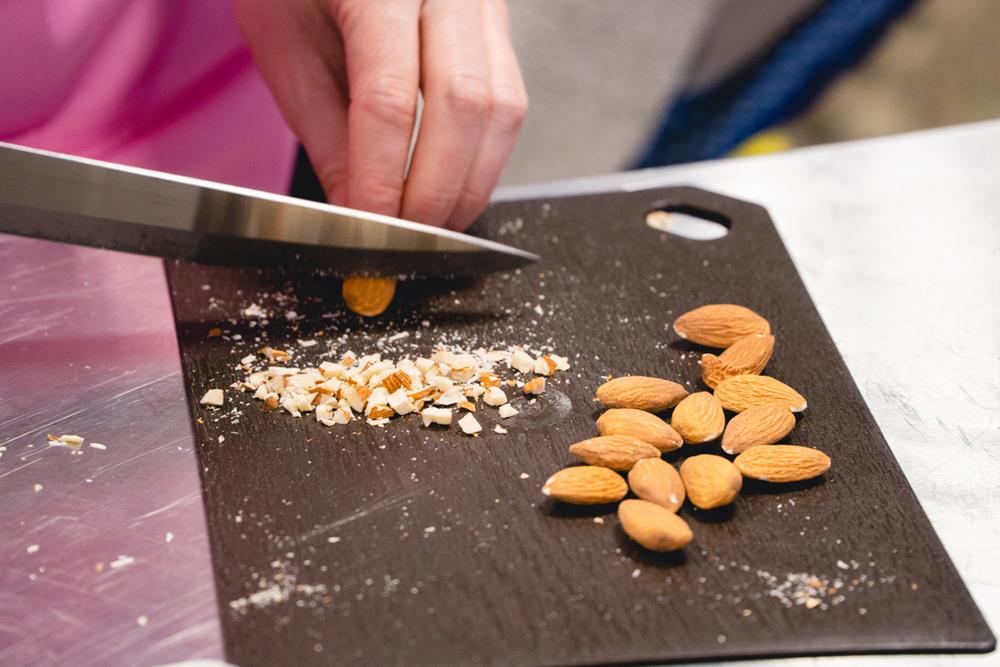
When chopping nuts by hand, select a sharp, sturdy knife for ease and safety. Use controlled, even strokes to achieve the desired texture for your recipe. Mastering these techniques will enhance both the flavor and presentation of your dishes.
Knife Selection Matters
Selecting the right chef's knife is crucial for finely and efficiently chopping nuts. A well-chosen knife ensures clean cuts, preventing nuts from crumbling or shattering. This selection significantly impacts the texture and consistency of your recipes while also enhancing safety and control.
When choosing a knife for chopping nuts, consider these key factors:
Blade Sharpness: A sharp blade ensures precise cuts and reduces the risk of uneven pieces.
Blade Size: An 8 to 10-inch chef's knife offers an ideal balance of control and chopping efficiency.
Handle Comfort: An ergonomic handle provides a firm grip and reduces hand fatigue during extended use.
Material: High-quality stainless steel blades are durable and maintain their sharpness longer, making them perfect for chopping nuts.
Optimal Cutting Techniques
To master the art of chopping nuts, start by ensuring your knife is consistently sharp for clean, precise cuts.
Begin by spreading your raw nuts evenly on a cutting board. Use a rocking motion with your knife to chop through them steadily. Aim for finely chopped nuts, not a paste, so take your time. This traditional technique enhances texture and flavor, boosting the presentation of your recipes.
Avoid over-chopping, as it can easily turn your nuts into a butter-like consistency. By maintaining a steady rhythm and pressure, you ensure each piece is uniform and perfect for your culinary needs.
Manual Food Chopper
If you're looking for a simple and effective way to chop nuts and seeds, a manual food chopper might be your perfect solution. This handy kitchen tool is designed to simplify your chopping tasks, especially when preparing ingredients for baked goods like chocolate chip cookies. Whether you need finely chopped nuts or seeds for your recipes, a manual food chopper provides the control and precision you require.
One of the main advantages of using a manual food chopper is its ease of use. It doesn't require electricity, making it ideal for quick, small-scale tasks. Here are some benefits:
Control Over Texture: Achieve the desired size and texture for your nuts or seeds, which is essential for various recipes.
Cost-Effective: A budget-friendly alternative to electric grinders, perfect for occasional use.
Space-Saving: Its compact design makes it easy to store, ideal for small kitchens.
Easy to Clean: Most models are simple to disassemble and wash, saving you time and effort.
Achieving Desired Texture
When blending nuts and seeds, ensuring they're dry as moisture can cause clumping, making it harder to get fine consistency. Gradually increase your blender speed to effectively break down the nuts and seeds, creating a uniform texture ideal for almond or seed flour.
Using a tamper tool is also beneficial. It allows you to push the ingredients toward the blades, ensuring even blending and preventing bits from sticking to the sides. For a chunkier texture, pulse your blender instead of running it continuously. This gives you more control over the consistency, suitable for recipes requiring a bit of crunch.
If you prefer a finer result, blend continuously but monitor the mixture. Occasionally, you might need to add a small amount of liquid like oil or water to assist the blending process and achieve a creamy texture.
Blending Nuts for Butters
Creating creamy nut butters at home is a rewarding experience, especially when you have a high-speed blender. This powerful tool ensures a smooth, delicious consistency.
Start by adding your nuts to the blender in small batches. This approach helps maintain a smoother texture and prevents the blender from overworking. As you blend, pause periodically to scrape down the sides, ensuring an even blend with no leftover chunks.
To facilitate the blending process, add a small amount of oil or liquid. This not only makes blending easier but also gives your nut butter a creamier texture. Experiment with different nuts and flavorings to create unique variations, such as almond butter with cinnamon or cashew butter with vanilla.
With these tips, you're ready to make delicious, homemade nut butters!
Grinding Seeds Efficiently
To grind seeds efficiently, start with a high-speed blender or food processor to achieve a consistent texture. These tools work great for breaking down tough seeds like sunflower, chia, or flax with minimal effort.
Making your own seed flour at home is cost-effective and gives you control over the ingredients. Store-bought seed flours can be expensive and may contain additives or preservatives. By grinding seeds yourself, you ensure the purity of your food.
Sunflower seed flour is a versatile, gluten-free option that you can easily make at home. It's perfect for those with nut allergies seeking alternative flours for baking.
Storing Blended Nuts and Seeds
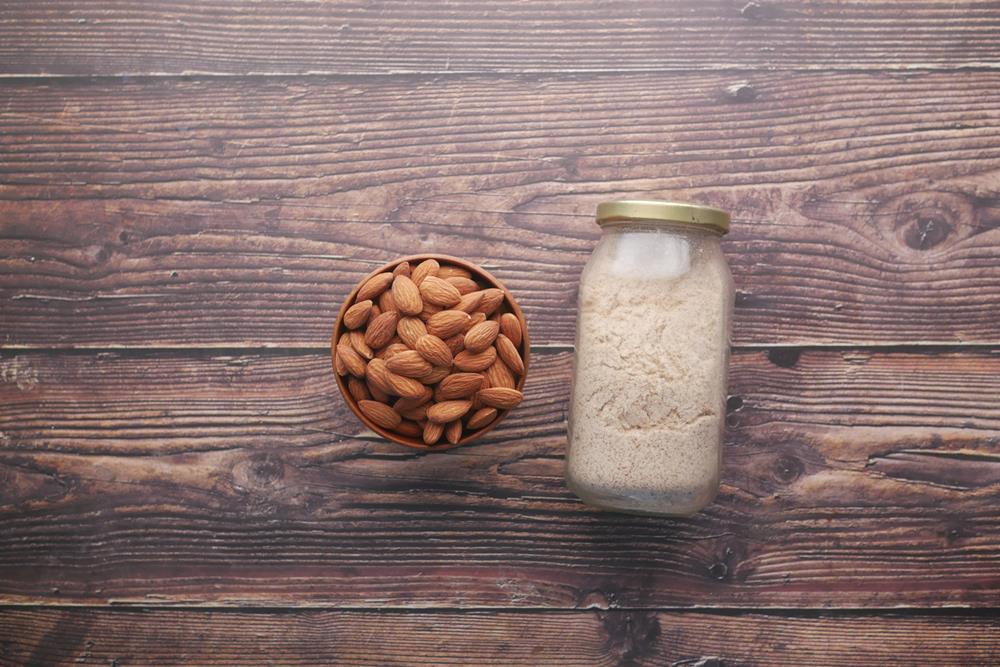
To maintain the freshness and flavor of your blended nuts and seeds, store them in airtight containers. This prevents moisture absorption and preserves their quality. Keep these containers in a cool, dark place, away from direct sunlight, to protect the flavors and nutrients of your almond flour, gluten-free blends, and pumpkin seeds.
For extended shelf life, particularly if your blends contain oils that can turn rancid, refrigerate them. If you need longer storage, freezing is an excellent option. Ensure the containers are properly sealed to avoid freezer burn.
Label your containers with the blending date. This helps track freshness and ensures you use the oldest stock first, optimizing your usage.
Conclusion
Blending nuts and seeds is a fantastic way to create nutritious and versatile ingredients for various dishes. To achieve the best results, consider factors like the type of nuts and seeds you're using, their moisture content, and the desired texture. Experiment with different combinations and techniques, such as pulsing or continuous blending, to find what works best for your recipes. Additionally, you can also consider adding a pinch of salt or sweeteners like honey or dates to enhance flavor. Ultimately, blending nuts and seeds opens up a world of culinary possibilities, offering endless opportunities to add richness, flavor, and nutrition to your meals and snacks.