How to Repair a Blender Motor?
A blender motor is the heart of a blender. It empowers the blades to blend the ingredients into a smooth consistency. However, if the blender motor is not functioning properly, it can be frustrating and inconvenient for you.
Before attempting to repair your blender motor, it is essential to diagnose the issue first. Some common causes of its malfunctioning include strange noises, overheating, or the blades not spinning properly. Once you have identified the root cause, it is easier to proceed with the repairing process.
Please note that the following instructions are general guidelines and may vary depending on the model and brand of the blender. If you are unsure or uncomfortable with fixing the motor all by yourself, it is best to seek professional help.
Gather Necessary Tools
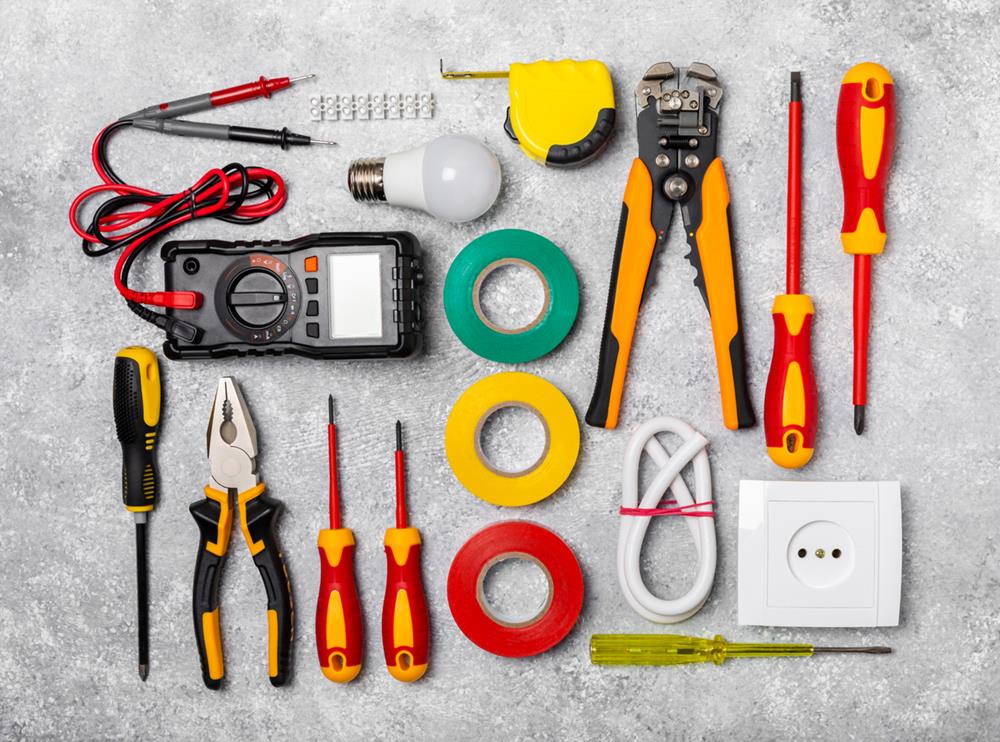
To start repairing your blender motor, ensure you have gathered all necessary tools and materials. You'll need a set of screwdrivers, pliers, and a multimeter for testing the electrical components of your blender. Having these tools ready will allow you to efficiently access and troubleshoot the motor, switch, and base of your appliance.
It is also advisable to have replacement fuses, motor brushes, and capacitors on hand. These components are often the culprits behind a malfunctioning blender and can be quickly swapped out if needed. Additionally, keep a heat shrink tubing kit nearby to insulate any electrical connections you may need to repair or replace.
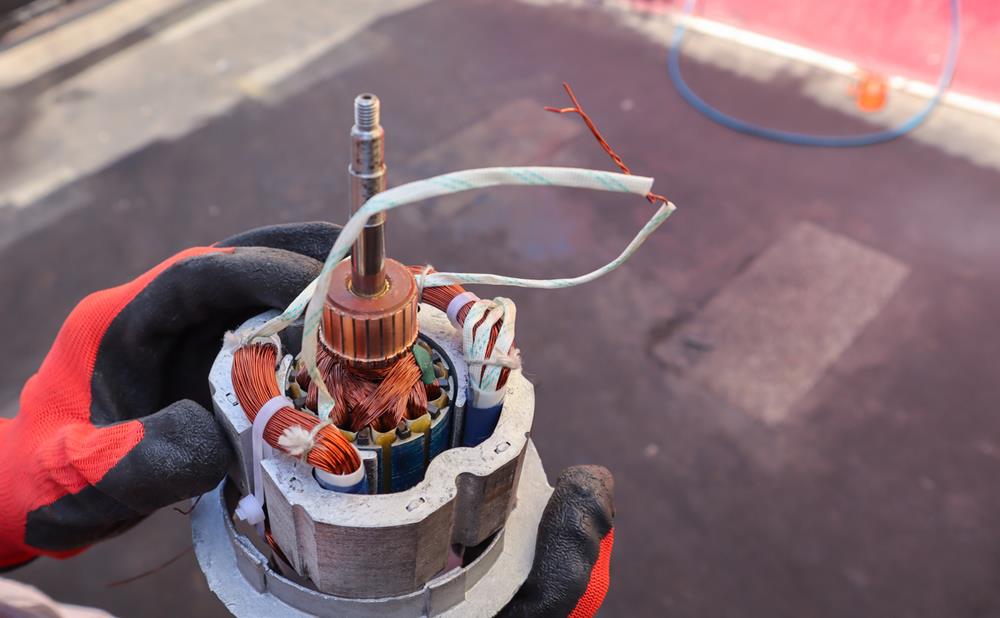
When working with the motor, especially when handling the motor fan, use a leather glove to protect your hands. This is particularly important during disassembly and testing phases. A clean, well-lit work area will make the repair process easier and safer.
Unplug and Disassemble
Begin by unplugging your blender to ensure your safety before starting any repair work.
Next, disassemble your blender by following these steps:
Remove the Blade Assembly: Unscrew the blade assembly from the base. This will provide clear access to other crucial parts.
Detach the Drive Stud: Locate the drive stud that connects the blade assembly to the motor shaft. Using appropriate tools, such as a screwdriver or pliers, carefully detach the drive stud.
Remove the Housing Screws: Identify and remove the screws securing the blender's housing using a screwdriver. Place these screws in a safe location.
Lift Off the Housing: Gently lift off the housing to expose the internal components, including the motor.
Label and Disconnect Lead Wires: Label and disconnect the lead wires from the motor. This will help prevent confusion during reassembly.
Examine Motor Connections: Carefully examine how the motor shaft connects to the internal mechanisms, ensuring you understand the configuration before proceeding further.
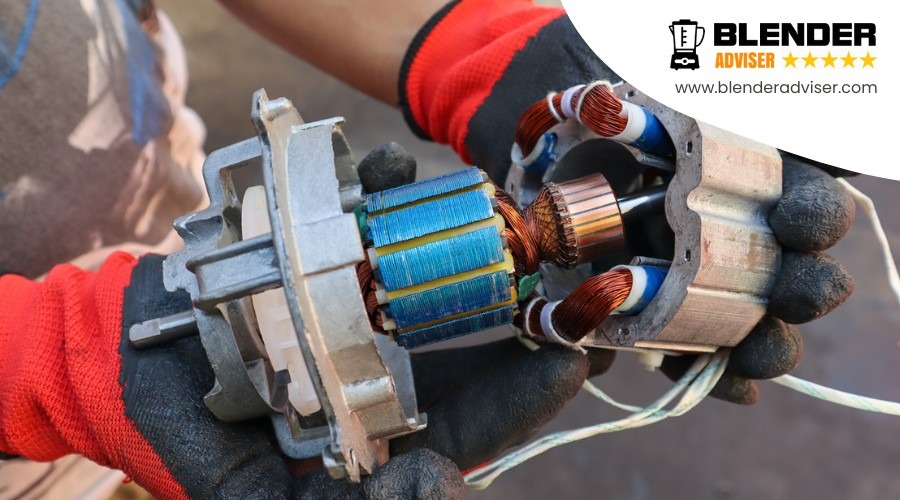
Inspect Motor Components
Begin inspecting the motor components by checking the motor brushes for any signs of wear or damage. Worn brushes can lead to motor failure, so if they appear thin or frayed, they need to be replaced.
Place the blender on its side to get a clearer view of the internal motor components. Next, ensure the drive stud fits securely in its position. This component connects to the blade inside the jar, ensuring smooth operation.
Examine the motor windings closely. Any signs of burning or discoloration indicate overheating and potential failure. If you observe these signs, the motor may require extensive repairs or replacement.
Additionally, check for any loose or disconnected wires within the motor assembly, as these can disrupt the electrical flow and halt the blender's operation.
Test Electrical Connections
Testing Electrical Connections
Using a millimeter, you can verify the continuity and proper voltage of electrical connections. Follow these steps to ensure accurate testing:
Secure Connections: First, ensure all wires are securely connected to the motor terminals.
Check Continuity: Set your multimeter to the continuity setting. Touch the probes to the motor terminals and verify that the circuit is complete. A beeping sound indicates a good connection.
Inspect Wiring: Examine the motor wiring for any signs of wear or damage. Frayed or burnt wires require immediate attention, as they can disrupt electrical flow.
Test Power Supply Voltage: Switch your multimeter to the voltage setting. Measure the power supply voltage at the motor to confirm it matches the specifications listed in the blender's manual.
Clean or Replace Parts
To maintain your blender motor in optimal condition, start by cleaning the motor brushes and inspecting them for wear. Use a soft brush to remove debris, ensuring proper contact. If the motor is running erratically or not at all, it may be time to replace the worn motor brushes, which can significantly enhance performance.
Next, focus on the drive shaft. Inspect it thoroughly for any signs of damage, as it plays a crucial role in the blade's rotation. Check the assembly socket where the drive shaft connects.
If you're unsure about any internal components, consult a professional. Proper maintenance and timely replacements can keep your blender running smoothly for years.
Reassemble the Blender
To reassemble your blender, first align the motor with the base, and then securely attach the blade assembly to prevent leaks or malfunctions.
Align Motor and Base
To ensure your blender operates effectively, carefully align the motor shaft with the base coupling.
Position the Motor Shaft: Hold the motor and lower it into the base, ensuring the shaft fits perfectly into the base coupling without forcing it. Misalignment can cause vibrations and inefficient blending.
Align the Drive Stud: Manually rotate the drive stud to ensure it aligns neatly with the blade assembly. This step prevents any jamming or misalignment.
Secure the Baseplate: Once aligned, use screws to secure the baseplate, keeping the motor firmly in place.
Double-Check All Components: Before fully reassembling, verify that every part is correctly positioned and aligned.
Following these steps will help maintain the efficiency and longevity of your blender.
Secure Blade Assembly
With the motor and base properly aligned, next step is to secure the blade assembly onto the motor shaft. Begin by positioning the blade assembly over the motor shaft, ensuring it fits snugly. Verify that the drive stud is correctly aligned with the blade assembly to prevent any slippage during operation.
Next, twist the blade assembly onto the motor shaft by hand until it's firmly in place. You should feel some resistance, indicating it's secure. A loose blade assembly can cause wobbling, potentially damaging the motor and leading to inefficient blending.
Examine the gasket between the blade assembly and the blender jar. The gasket should fit snugly to create a seal that prevents leaks. Adjust the gasket if necessary, ensuring it's properly seated.
Finally, perform a quick check on the drive stud to confirm it's tightened and aligned correctly. This final check helps prevent any issues when you power up the blender.
With everything secure, you're now ready to test the blender's functionality.
Test Blender Functionality
Reinstall the motor into the housing, ensuring it fits securely. Use the appropriate screws to fasten the motor firmly in place.
Reconnect the lead wires to the multispeed switch block in the correct order, and double-check that all components are properly aligned and secured.
To test the blender's functionality, follow these steps:
Reassemble the Housing: Ensure the blender's housing is fully closed and locked.
Check the Multispeed Switch: Confirm the multispeed switch is correctly connected to the motor.
Inspect Blade Assembly: Verify that the blades are securely attached and can rotate freely.
Power Up: Plug in the blender and test various speed settings.
When you turn the blender on, observe the blade operation. They should rotate smoothly without any odd noises or vibrations.
If the blades don't move or the motor makes unusual sounds, turn off the blender immediately and recheck your connections and assembly.
Test the Motor
To test the motor, follow these steps:
Verify that the power supply is functioning correctly.
- Use an ohmmeter to check the motor windings for continuity and resistance.
- Inspect the motor brushes for wear and confirm they make proper contact.
These steps ensure the motor operates reliably and efficiently.
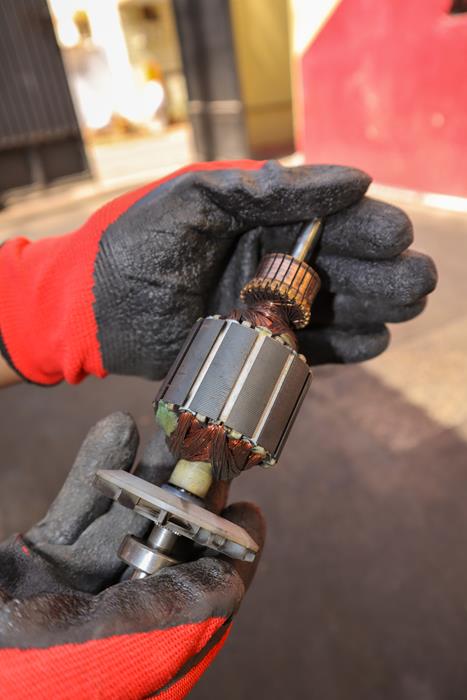
Inspect Motor Winding
When inspecting the motor winding, use an ohmmeter to check for continuity and resistance, ensuring there's no damage. Start by disconnecting the blender from any power source and accessing the motor. Look for visible signs of damage, such as burnt or melted insulation. These signs indicate that the winding may be compromised.
Next, use your ohmmeter to test each winding phase. Place the ohmmeter probes on the winding terminals and check for continuity. A healthy winding should show continuity, indicating that current can flow through it without interruption. If there's no continuity, the winding could be broken and may need replacement.
Additionally, measure the resistance of the motor winding. Compare your readings with the specifications in the blender's manual or provided by the manufacturer. Significant deviations from the expected resistance values can indicate issues like short circuits or open circuits within the winding.
Ensure the motor winding is securely connected and not loose or disconnected. Loose connections can cause intermittent operation or complete motor failure.
Evaluate Motor Brushes
Before diving into testing, ensure the blender is unplugged to avoid any electrical hazards. Motor brushes are crucial for your blender's performance and require careful inspection and testing.
Check for Continuity: Use an ohmmeter to test the motor brushes. Attach the ohmmeter probes to the brush terminals and look for continuity. If there's no continuity, the brushes are malfunctioning and need attention.
Inspect for Wear: Examine the motor brushes closely. If they appear worn or damaged, they won't provide the necessary contact to power the motor efficiently.
Replace if Necessary: If the motor brushes are worn or damaged, replace them. New motor brushes will ensure proper contact and enhance motor performance.
Clean the Holders: Thoroughly clean the motor brush holders and contacts. Dirt and debris can obstruct a good connection, impacting the motor's operation.
Preventive Maintenance Tips
Regularly cleaning the multispeed switch and avoiding overloading the blender can significantly extend the life of your blender motor. To keep your blender running smoothly, it's crucial to implement preventive maintenance. Begin by routinely inspecting the drive shaft and metal drive studs for any signs of wear or damage. This simple step can prevent more significant issues down the line.
Also, ensure that the seals in both the small blender jar and the housing are intact. This helps prevent leaks, which can lead to motor damage over time. Avoid overfilling the blender jar, especially with liquids, as overflow can seep into the motor and cause malfunctions.
To make this easier, here's a quick guide to essential preventive maintenance tips:
| Task | Frequency | Tools Needed |
|---|---|---|
| Clean multispeed switch | Weekly | Soft brush, cloth |
| Inspect drive shaft | Monthly | Visual inspection |
| Check seals | Monthly | None |
| Avoid overloading | Every use | None |
| Clean metal drive studs | Monthly | Soft brush, cloth |
Frequently Asked Questions
Can a Blender Motor Be Repaired?
Yes, a blender motor can be repaired. Common repairs include replacing faulty components such as brushes or capacitors, and cleaning and lubricating moving parts. Utilizing an ohmmeter can help diagnose issues. However, if the motor has severe damage, it may need to be replaced entirely.
How Do I Know if My Blender Motor Is Bad?
To determine if your blender motor is faulty, check for power at the motor terminals, listen for unusual noises, ensure the motor shaft spins freely, and look for any burnt smells or signs of intermittent operation.
How to Fix a Blender That Won't Spin?
First, check if the drive stud is worn or damaged. Inspect the blade assembly socket for any misalignment. Replace the gasket if it is worn out or damaged. Ensure the connection between the drive stud and the blade assembly is secure. If the drive stud is rounded, replace it.
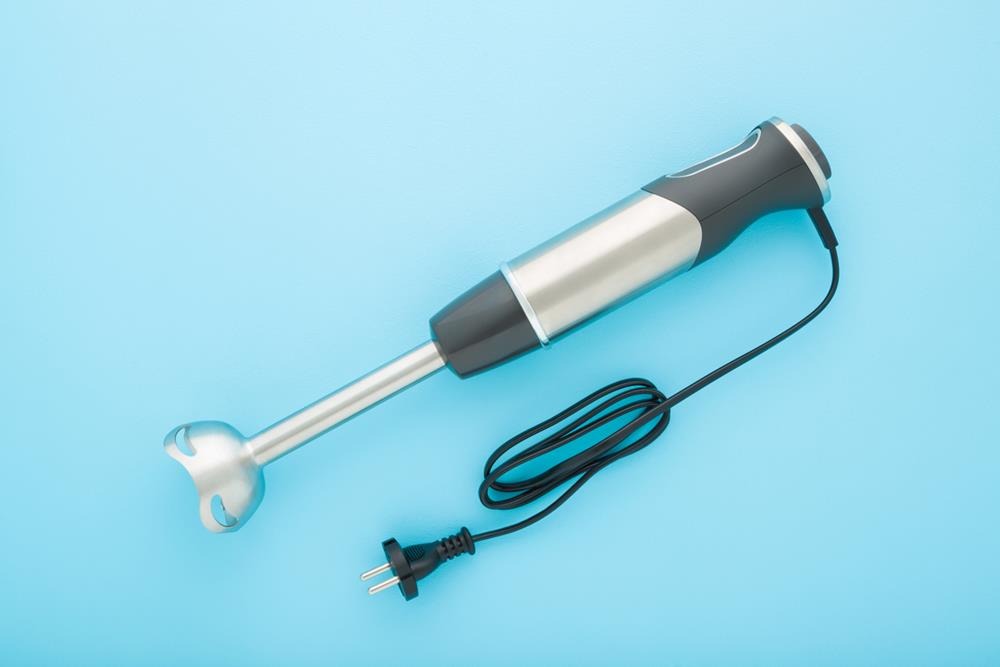
Why Is My Hand Blender Motor Not Working?
Your hand blender motor might not be working due to several potential issues: a faulty power cord, worn motor brushes, or loose connections. Ensure proper ventilation to prevent overheating. If basic troubleshooting doesn't resolve the problem, you may need to seek professional repair or consider replacing the unit.
Conclusion
In conclusion, repairing a blender motor can be a cost-effective and sustainable solution to extend the life of your appliance. By following the steps outlined in this guide and properly diagnosing the issue, you can successfully repair your blender motor and get your machine back in working order.
Remember to always prioritize safety when working with electrical appliances. Make sure to unplug the blender before attempting any repairs and be cautious when handling the motor components.
If you encounter any difficulties or feel unsure about your ability to repair the blender motor yourself, don't hesitate to seek professional help. It's better to be safe than sorry when it comes to repairing electrical appliances.
By taking proper care of your blender and addressing any motor issues promptly, you can continue to enjoy making delicious and nutritious drinks for years to come. Cheers to happy blending!